Difference between revisions of "Testing"
(→Test output) |
|||
| (One intermediate revision by one other user not shown) | |||
| Line 3: | Line 3: | ||
[[File:GVConsoleTesting.jpg|thumb|Testing section]] | [[File:GVConsoleTesting.jpg|thumb|Testing section]] | ||
| − | Testing Section will facilitate | + | Testing Section will facilitate the functional test of some components of {{GVESB}}. |
| − | In this area the user can | + | In this area the user can populate the fields of the input objects (as example a [[GVBuffer]] instance) and display the service's execution result. The input object fields, such as the output, changes depending on the requested test. |
=={{GVCONSOLE}} Configuration== | =={{GVCONSOLE}} Configuration== | ||
| − | ''Testing'' is a Web application that provides a {{GVESB}} service invocation simulating a client request. | + | ''Testing'' is a Web application that provides a {{GVESB}} service invocation facility, simulating a client request. |
| − | In this area you can test the | + | In this area you can test the already configured services. |
The configurable tests in Testing Area are related to the following sub-systems: | The configurable tests in Testing Area are related to the following sub-systems: | ||
* '''Core''' to test the direct call to the EJB of GreenVulcano’s Core. | * '''Core''' to test the direct call to the EJB of GreenVulcano’s Core. | ||
| − | The '' | + | The ''Testing'' view is divided into three sections: |
* [[#Data input|Data input]] | * [[#Data input|Data input]] | ||
| − | * [[# | + | * [[#Test output|Test output]] |
* [[#Exceptions|Exceptions]] | * [[#Exceptions|Exceptions]] | ||
===Data input=== | ===Data input=== | ||
| + | [[File:GVConsoleTestingData.jpg|thumb|{{GVCONSOLE}} Testing data]] | ||
| + | For a test that accepts a [[GVBuffer]] input object the display appears as shown in the following figure: | ||
| − | + | [[GVBuffer]] input Object has default values already set, as ''Id'', but can be changed by the user, or been generated using the "getId" function. In the case of insertion by the user, we recall the normal rules for compiling the ID (unless you want to test the case of incorrect ID insertion): | |
| − | [[ | ||
| − | |||
| − | |||
| − | |||
* Length of 24 hex digits. | * Length of 24 hex digits. | ||
* Must contain only upper case letters from A to F. | * Must contain only upper case letters from A to F. | ||
* Not end with 0000. | * Not end with 0000. | ||
| − | If user enters incorrect values, the application will however attempt to | + | If user enters incorrect values, the application will however attempt to execute the ''test'' and returns an exception. |
| + | All the text box for entering input [[GVBuffer]] values are editable. | ||
| − | + | These fields are part of the test environment: | |
| − | * '''Output File Name:''' name of the file where the test output will be saved; | + | [[File:GVConsoleTestingDataInputFile.jpg|thumb|Test output: file writing]] |
| − | * '''Input File Name:''' name of the | + | * '''Output File Name:''' name of the file where the last test output will be saved; |
| + | * '''Input File Name:''' name of the file where the last test input will be saved; | ||
| + | [[File:GVConsoleTestingDataIter.jpg|thumb|Iteration number]] | ||
* '''Iterator Number:''' number of invocations to be run using the same payload; | * '''Iterator Number:''' number of invocations to be run using the same payload; | ||
| − | * '''ID:''' | + | In case of iteration of the same test, the [[GVBuffer]] input will be the same but the Id is regenerated for each test. |
| − | * '''Service:''' name of the | + | It is also possible to define a file that contains all the looped test output. |
| − | * '''System:''' name of the | + | |
| − | * '''ReturnCode:''' | + | These fields are specific for test that accept a [[GVBuffer]] input: |
| + | * '''ID:''' transaction unique identifier; | ||
| + | * '''Service:''' name of the Service to be invoked; | ||
| + | * '''System:''' name of the Client System to be simulated; | ||
| + | * '''ReturnCode:''' numeric return code; | ||
* '''Character Encoding:''' payload encoding; | * '''Character Encoding:''' payload encoding; | ||
| − | * '''Payload:''' data to be sent | + | * '''Payload:''' input data to be sent; |
| − | * '''Properties:''' GVBuffer properties; | + | * '''Properties:''' input GVBuffer properties; |
| − | + | Management of ''properties'' requires the inclusion of multiple name-value pairs with the button ''Properties''.<br/>Moreover, each inserted pair can always be eliminated by clicking on [del] icon. | |
| − | |||
| + | * '''Transaction Mode:''' transaction management; | ||
| − | + | * '''Forward Name:''' name of the forward to be invoked. | |
[[File:GVConsoleTestingDataUpload.jpg|thumb|Upload Data]] | [[File:GVConsoleTestingDataUpload.jpg|thumb|Upload Data]] | ||
Regarding the ''Payload'', the user has the option to insert the value in the text box or upload a file with the value by the UPLOAD function. | Regarding the ''Payload'', the user has the option to insert the value in the text box or upload a file with the value by the UPLOAD function. | ||
| + | In case of using the UPLOAD function, the Text Area will contain the selected file content. | ||
| − | + | The UPLOAD function allows the selection of a file and the file content encoding: | |
| − | |||
| − | |||
| − | The UPLOAD function allows the selection of a file and | ||
| − | |||
* Binary | * Binary | ||
* US-ASCII | * US-ASCII | ||
| Line 69: | Line 71: | ||
* UTF-16 | * UTF-16 | ||
| + | If user wants to upload a binary file, the text box of the ''Payload'' field will be replaced by a ''showData'' button that just displays the binary data in the form of hex ''dump''. | ||
| − | + | To reset the ''Payload'' field to a text box just click the resetData key. | |
| − | |||
| − | |||
| − | |||
| − | |||
| − | |||
| − | + | The choice of encoding will change the display of the ''Payload'' field. This view, to be correct, requires that you save the file in the right encoding, where it is required by the UPLOAD function. | |
| + | For executing the tests, the page offers a number of buttons as there are {{GVESB}} standard workflow names to test. | ||
| − | [[File:GVConsoleTestingEJBParam.jpg|thumb|Parameters for the connection to EJB]] | + | {|class="note" |
| + | |[[File:GVConsoleTestingEJBParam.jpg|thumb|Parameters for the connection to EJB]] | ||
Given the specific features of the test to invoke the EJBs, you can set the connection parameters through the ''"Set JNDI Parameters"'' link. This Link proposes a series of useful parameters for an invocation of an EJB and then: | Given the specific features of the test to invoke the EJBs, you can set the connection parameters through the ''"Set JNDI Parameters"'' link. This Link proposes a series of useful parameters for an invocation of an EJB and then: | ||
* JNDI Name: Name of the EJB to be invoked (Required) | * JNDI Name: Name of the EJB to be invoked (Required) | ||
| − | * JNDI Factory: | + | * JNDI Factory: FQN of the application server specific context factory |
| − | * Url: URL | + | * Url: Connection factory URL |
* User: Application server User | * User: Application server User | ||
* Password: Application server Password | * Password: Application server Password | ||
| − | |||
| − | |||
The text box will always be editable and propose in the first instance the default values specified in the configuration file: | The text box will always be editable and propose in the first instance the default values specified in the configuration file: | ||
| − | |||
* ''GVSupport.xml'' | * ''GVSupport.xml'' | ||
| − | This file will be | + | This file will be configured through the {{GVESB}} interface. |
| − | |||
| − | |||
| − | |||
| − | |||
| − | |||
| − | |||
| − | |||
| − | |||
| − | |||
| − | |||
| − | |||
| − | |||
| − | |||
| − | |||
| − | |||
| − | |||
| − | |||
| + | If the user change these parameters, the values will remain so for the duration of the test and are resetted to the configured ones. | ||
| + | |} | ||
| − | === | + | ===Test output=== |
[[File:GVConsoleTestingGVBufferOutput.jpg|thumb|Single Test Output]] | [[File:GVConsoleTestingGVBufferOutput.jpg|thumb|Single Test Output]] | ||
| − | Both for | + | Both for single test than iterated test, the application does not eliminate the input, but still maintains the view to facilitate the comparison with the output data. |
| + | Based on the service expected output format, the application will give the possibility to choose between ''Show Binary'', which presents the binary data in a hexadecimal ''dump'', and ''Show as text'', which presents the data as a string (with encoding to be chosen in a combo box). | ||
| − | |||
| Line 127: | Line 109: | ||
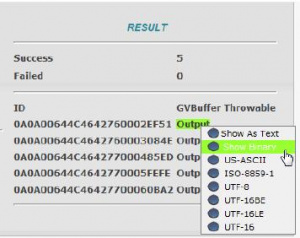
[[File:GVConsoleTestingResult.jpg|thumb|Five iteration output]] | [[File:GVConsoleTestingResult.jpg|thumb|Five iteration output]] | ||
| − | In | + | In case of iterated test run, the output is presented as the following figure: |
| − | |||
| − | |||
| − | The ID is generated at run time and will be | + | The ID is generated at run time and will be different for each iteration. By the link "Output" you can see the result of single test, specifying the encoding type. |
===Exceptions=== | ===Exceptions=== | ||
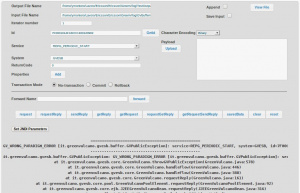
[[File:GVConsoleTestingException.jpg|thumb|Wrong Paradigm Error]] | [[File:GVConsoleTestingException.jpg|thumb|Wrong Paradigm Error]] | ||
| − | + | If the service returns an exception it' visualized with the stack trace. | |
| − | + | The following picture shows a service invocation failed because the user invoke the wrong Operation: | |
| − | |||
| − | The following picture shows a service invocation failed because | ||
Latest revision as of 13:26, 5 March 2012
Description
Testing Section will facilitate the functional test of some components of GreenVulcano® ESB.
In this area the user can populate the fields of the input objects (as example a GVBuffer instance) and display the service's execution result. The input object fields, such as the output, changes depending on the requested test.
GV Console Configuration
Testing is a Web application that provides a GreenVulcano® ESB service invocation facility, simulating a client request.
In this area you can test the already configured services.
The configurable tests in Testing Area are related to the following sub-systems:
- Core to test the direct call to the EJB of GreenVulcano’s Core.
The Testing view is divided into three sections:
Data input
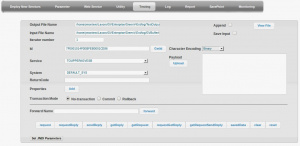
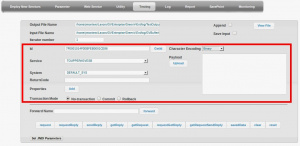
For a test that accepts a GVBuffer input object the display appears as shown in the following figure:
GVBuffer input Object has default values already set, as Id, but can be changed by the user, or been generated using the "getId" function. In the case of insertion by the user, we recall the normal rules for compiling the ID (unless you want to test the case of incorrect ID insertion):
- Length of 24 hex digits.
- Must contain only upper case letters from A to F.
- Not end with 0000.
If user enters incorrect values, the application will however attempt to execute the test and returns an exception.
All the text box for entering input GVBuffer values are editable.
These fields are part of the test environment:
- Output File Name: name of the file where the last test output will be saved;
- Input File Name: name of the file where the last test input will be saved;
- Iterator Number: number of invocations to be run using the same payload;
In case of iteration of the same test, the GVBuffer input will be the same but the Id is regenerated for each test. It is also possible to define a file that contains all the looped test output.
These fields are specific for test that accept a GVBuffer input:
- ID: transaction unique identifier;
- Service: name of the Service to be invoked;
- System: name of the Client System to be simulated;
- ReturnCode: numeric return code;
- Character Encoding: payload encoding;
- Payload: input data to be sent;
- Properties: input GVBuffer properties;
Management of properties requires the inclusion of multiple name-value pairs with the button Properties.
Moreover, each inserted pair can always be eliminated by clicking on [del] icon.
- Transaction Mode: transaction management;
- Forward Name: name of the forward to be invoked.
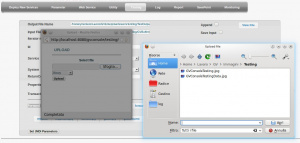
Regarding the Payload, the user has the option to insert the value in the text box or upload a file with the value by the UPLOAD function.
In case of using the UPLOAD function, the Text Area will contain the selected file content.
The UPLOAD function allows the selection of a file and the file content encoding:
- Binary
- US-ASCII
- ISO-8859-1
- UTF-8
- UTF-16BE
- UTF-16LE
- UTF-16
If user wants to upload a binary file, the text box of the Payload field will be replaced by a showData button that just displays the binary data in the form of hex dump.
To reset the Payload field to a text box just click the resetData key.
The choice of encoding will change the display of the Payload field. This view, to be correct, requires that you save the file in the right encoding, where it is required by the UPLOAD function.
For executing the tests, the page offers a number of buttons as there are GreenVulcano® ESB standard workflow names to test.
|
Given the specific features of the test to invoke the EJBs, you can set the connection parameters through the "Set JNDI Parameters" link. This Link proposes a series of useful parameters for an invocation of an EJB and then:
The text box will always be editable and propose in the first instance the default values specified in the configuration file:
This file will be configured through the GreenVulcano® ESB interface. If the user change these parameters, the values will remain so for the duration of the test and are resetted to the configured ones. |
Test output
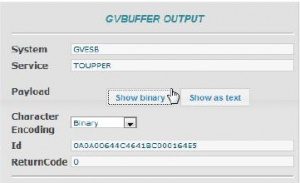
Both for single test than iterated test, the application does not eliminate the input, but still maintains the view to facilitate the comparison with the output data.
Based on the service expected output format, the application will give the possibility to choose between Show Binary, which presents the binary data in a hexadecimal dump, and Show as text, which presents the data as a string (with encoding to be chosen in a combo box).
In case of iterated test run, the output is presented as the following figure:
The ID is generated at run time and will be different for each iteration. By the link "Output" you can see the result of single test, specifying the encoding type.
Exceptions
If the service returns an exception it' visualized with the stack trace. The following picture shows a service invocation failed because the user invoke the wrong Operation:
