Difference between revisions of "Examples using the GV Console"
| Line 7: | Line 7: | ||
#`Click Submit. | #`Click Submit. | ||
| − | The section [[ | + | The section [[Deploy_Service|Deploy Services]] will be open. In this section you can select the services you want to deploy. |
# Clicking on service ValidateXMLFiles a new view will be open containing the files GVCore.xml present in local and in server. | # Clicking on service ValidateXMLFiles a new view will be open containing the files GVCore.xml present in local and in server. | ||
| Line 16: | Line 16: | ||
[[File:GVConsoleUtilityReload1.jpg|thumb|{{GVCONSOLE}} Utility section]]Now pass to the {{GVCONSOLE}} section [[Utility]]. | [[File:GVConsoleUtilityReload1.jpg|thumb|{{GVCONSOLE}} Utility section]]Now pass to the {{GVCONSOLE}} section [[Utility]]. | ||
| − | # Click on [[ | + | # Click on [[Reload_Configuration|Reload configuration]] |
# Select GVCore.xml and then Reload. A new windows will be open to confirm the operation | # Select GVCore.xml and then Reload. A new windows will be open to confirm the operation | ||
# Click OK. | # Click OK. | ||
Revision as of 14:19, 12 February 2012
This section shows how to deploy and test a new service using the GV Console® using the ValidateXMLFiles and ValidateSingleXMLFile services, presented in the section First_GVESB_Projects.
Suppose you have saved the VulCon Configuration file as "${{gv.app.home}}/TEST/REPG1.zip". To deploy the new Services follow this steps:
- Start GreenVulcano® ESB
- Access to the GV Console.
- In the Deploy New Service section click Sfoglia... (Browse) and select the file where you have saved the VulCon configuration.
- `Click Submit.
The section Deploy Services will be open. In this section you can select the services you want to deploy.
- Clicking on service ValidateXMLFiles a new view will be open containing the files GVCore.xml present in local and in server.
- Click Deploy. Now you can save the document and write some notes about it.
- Save the Document. Saving you return to the Deploy Service section.
- Repeat operations 1, 2 and 3, now with the service ValidateSingleXMLFile
Now pass to the GV Console section Utility.
- Click on Reload configuration
- Select GVCore.xml and then Reload. A new windows will be open to confirm the operation
- Click OK.
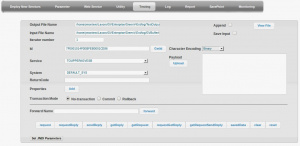
Go to the GV Console section Testing. In this section you can finally test your new services:
- Into the Service voice select ValidateXMLFiles
- Into the System voice select GVESB
- Click RequestReply
As you see, the Test View was expanded and it is also possible to view the Test output where there are present some properties, among those the GVFSM_EXISTING_FILES property setted to 3. But let us see what happened in our File System:
- In ${{gv.app.home}}/TEST/TESTFS/TestXML/input there are no files.
- In ${{gv.app.home}}/TEST/TESTFS/TestXML/validated files XML1.xml and XML3.xml were moved into.
- In ${{gv.app.home}}/TEST/TESTFS/TestXML/discarded file XML2.xml were moved into and a report file named XML2.xml.result was created.


