VulCon first flow
First flow service
The easiest way to create a VulCon service is interacting with the “Wizard New Service” option. From the Core view
GVServices --> Services
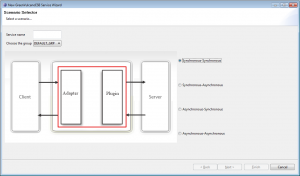
and clicking on the Services element with the right mouse button, as shown in the figure, the user can choose four different Paradigms of communication:
- Synchronous - Synchronous
- Synchronous - Asynchronous
- Asynchronous - Synchronous
- Asynchronous - Asynchronous
In addition to service name, user may select a group (among those ones already configured) and a communication paradigm between the couples Client-ESB and ESB-Server. Now let’s choose “DEFAULT_GRP” as group and “Synchronous-Synchronous” as scenario. Service will be called “TOUPPER_VULCON”. Continuing with the wizard the user chooses the triple
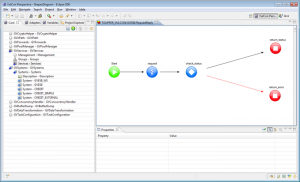
After clicking on finish button, a new TOUPPER_VULCON service will be available, and the VulCon editor will display the flow, see figure Operation diagram. User may customize a service flow, adding new operation nodes with the Palette tool. For example, let’s add a Notification node to notify a flow error (after the check node: it’s identified with a red arrow). When you drag the Node Editor on the new Notification Wizard will appear, to guide the user to the configuration of the node in this case the necessary steps are:
- id: add the node name.
- on-critical-error: error management, you decide whether to continue or end the flow
- next-node-id: name of the next node
- output: GVBuffer naming the output node
after the operation the new node will be configured and displayed on the flow. Once a service flow is correctly configured, the user can export its configuration from VulCon deploy and test GV Console®.
More examples are available here.

