GVExample TOUPPER
Description
This example shows a simple synchronous service and its configuration. The service accepts a string as input, then returns it converted to uppercase.
How To
As this might be our first example, the first step will be the creation of a new VulCon Project.
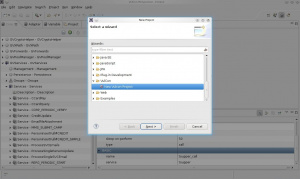
- From the Menu panel of Eclipse click File -> New -> Project. A new windows will be open containing the projects type.
- Select Vulcon -> "New Vulcon Project" item. Then click Next
- Set the project name and Location. We named the project GVEXAMPLE and choose a Location of your choice. Then click finish. The new VulCon project GVEXAMPLE has been created.
The preferred mode for creating a Service (at least its skeleton) is through the Service Wizard. Before using it you must first configure the test VCL plugin tho execute the uppercase conversion. So let's define a new Group, System and Channel, if you do not want to use those already present, and then start the Wizard.
From the core view:
- Right click the element Groups -> Insert after (or Insert before) -> Group. A new element Group will be created.
- Click on the Group new element and set the attribute id-group from the Properties View. We named it TEST_GROUP.
- Expand the GVSystems item.
- Right clicking on Systems, insert-after -> System. A new element System will be created.
- Set the System parameters in the Properties panel. We named it GVESB_TEST
- You can insert a new Channel right clicking the new System element -> Insert after (or Insert before) -> Channel*. A new Channel element will be created
- Click on this new Channel element and set the property id_channel. We named it TEST_CHANNEL
- Finally, insert the operation you need for the workflow. In this case a test-service-call. Right clicking Channel -> Insert after -> test-service-call. A new element test-service-call will be created.
- Set the test-service-call attributes. From the properties view set the name attribute as test and the service attribute as toupper.
Now we are able to use the Wizard.
- From the Core View of VulCon. Right click the element Services -> Wizard New Service
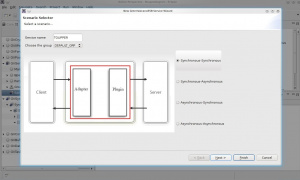
- A new window will be open where you can set the name of the Service you want to create, in this case we name it TOUPPER, and as Group, we use TEST_GROUP. You can also select the communication paradigm, for this example it will be synchronous-synchronous. Click next.
- Set System as GVESB_TEST and Channel as TEST_CHANNEL. Then choose the Operation, in this case test. Then finish.
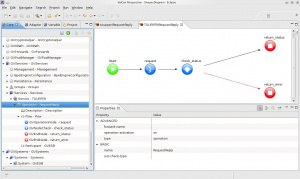
As you can see from the core view, inside the Services element, a new Service named TOUPPER has been created. The editor will be opened automatically, showing the nodes involved in our Flow.
- The Start node sets the flow first node. In this case request
- The Operation node request calls the test-service-call operation test and executes it.
- A Check node named check_status is also inserted for controlling the success of the preceding node.
- If success flow passes to the End node return_status
- In case of Error, flow goes to the End node return_error. The difference with return_status is signed by the Connection with check_status Check node. In this case an Error Connection (the Red arrow) have been used.
- Save clicking the Save icon from the Core View
The GVCore.xml configuration file will be changed as follows:
- Into Groups element will be added the tag
<Group group-activation="on" id-group="TEST_GROUP"/>
- Into Services element will be added the tag
<Service group-name="TEST_GROUP" id-service="TOUPPER" service-activation="on"
                     statistics="off">
     <Operation name="RequestReply" operation-activation="on"
                           out-check-type="sys-svc-tid" type="operation">
         <Description>VulCon generated Operation</Description>
         <Participant id-channel="TEST_CHANNEL" id-system="GVESB_TEST"/>
         <Flow first-node="request" point-x="50" point-y="150">
              <GVOperationNode class="it.greenvulcano.gvesb.core.flow.GVOperationNode"
                   id="request" id-system="GVESB_TEST"
                   input="input_test" next-node-id="check_status"
                   op-type="call" operation-name="test"
                   output="output_test" point-x="200" point-y="150"
                   type="flow-node"/>
              <GVNodeCheck class="it.greenvulcano.gvesb.core.flow.GVNodeCheck"
                   default-id="return_status" id="check_status"
                   input="output_test" on-exception-id="return_error"
                   op-type="check" point-x="350" point-y="150"
                   type="flow-node"/>
              <GVEndNode class="it.greenvulcano.gvesb.core.flow.GVEndNode"
                   id="return_status" op-type="end" output="output_test"
                   point-x="700" point-y="50" type="flow-node"/>
              <GVEndNode class="it.greenvulcano.gvesb.core.flow.GVEndNode"
                   id="return_error" op-type="end" output="output_test"
                   point-x="700" point-y="250" type="flow-node"/>
         </Flow>
     </Operation>
</Service>
- Into Systems element will be added the tag
<System id-system="GVESB_TEST" system-activation="on">
   <Channel id-channel="TEST_CHANNEL">
        <test-service-call class="it.greenvulcano.gvesb.virtual.internal.TestServiceCall"
                name="test" service="toupper" type="call"/>
   </Channel>
</System>
Now you are able to test your first VulCon Service from the GV Console®. But first you need to export the configuration.
Once the flow is correctly configured, the user can export the configuration and pass it to the GreenVulcano® ESB import tool, in order to add into the GreenVulcano® ESB the service just created.
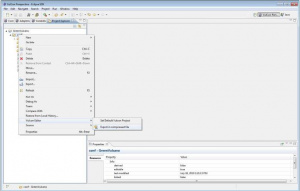
- The Export function is available in the view "Project". Expand the project
- Before you proceed press F5 to refresh the file list.
- Right click the conf folder. It will open a drop-down list.
- Export your project as a VulCon project file (.zip).
Testing with GV Console
It is finally the time to test your project. To do that execute the following steps:
Suppose you have saved the VulCon project as REPG1.zip. To deploy the new Service follow this steps:
- Start GreenVulcano® ESB
- Access to the GV Console.
- In the Deploy New Service section click Browse and select the file where you saved the VulCon configuration.
- Click Submit.
The section Deploy Services will be open. In this section you can select the services you want to deploy.
- Clicking on service TOUPPER a new view will be showed containing the file GVCore.xml present in local and on server side.
- Click Deploy. Now you can save the document and write some notes about it.
- Save the Document. By saving you will return to the Deploy Service section.
Now pass to the GV Console section Utility.
- Click on Reload configuration
- Select GVCore.xml and then Reload. A new windows will be open to confirm the operation
- Click OK.
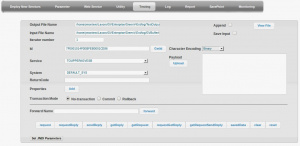
Go to the GV Console section Testing. In this section you can finally test your new service:
- Into the Service field select TOUPPER
- Into the System field select GVESB_TEST (Optional)
- Into the Payload area insert the text to convert in uppercase
- Click RequestReply
When the service completes, the Testing view will be expanded for containing the GVBUFFER OUTPUT. In this case no properties have been defined so there are only be presents the main informations about the process (System, Service, Id, etc.). To view the service payload output click on Show as Text button. Standard fields and the detailed GVBuffer are described in the Output File Name (the default location is $GV_HOME/log/TestOutput.txt).
In case of error or exceptions you can review the logs file present in the folder $GV_HOME/log/.
