Difference between revisions of "Example Creating a new VulCon project"
(→New Project {{VULCON}}) |
(→New Project {{VULCON}}) |
||
| Line 27: | Line 27: | ||
[[File:Preferences-vulcon.jpg|center|thumb|500px|PreferencesVulCon]] | [[File:Preferences-vulcon.jpg|center|thumb|500px|PreferencesVulCon]] | ||
| − | <div style="text-align:center;">''Figure | + | <div style="text-align:center;">''Figure 1 Preferences.''</div> |
Export function is available in the “Menu Explorer” view, File > Export > “VulCon Export Tool > VulCon Project | Export function is available in the “Menu Explorer” view, File > Export > “VulCon Export Tool > VulCon Project | ||
Simply select the project to export and enter a name in the jar file and click Finish. | Simply select the project to export and enter a name in the jar file and click Finish. | ||
| + | |||
| + | [[File:ExportConfiguration.png|center|thumb|500px|ExportConfiguration]] | ||
| + | <div style="text-align:center;">''Figure 6 Export Configuration.''</div> | ||
Revision as of 09:29, 2 January 2012
New Project VulCon
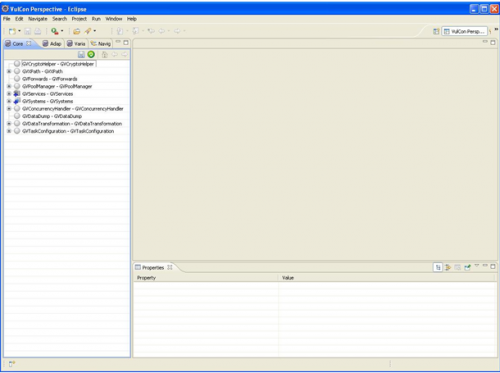
Firstly user has to create a new project. As shown below, VulCon has a own kind of project, and startup files will be generated in order to configure VulCon views properly. Here is a sequence of screenshots that show how to create a new project. Finally user may switch to VulCon perspective.
File:NewProject.png
New Project
Figure 1 New project.
File:NewVulConProject.png
NewVulConProject
Figure 2 New VulCon project.
File:ChoosingProject name.png
ChoosingProjectName
Figure 3 Choosing a new project name.
File:OpeningVulConPerspective.png
OpeningVulConPerspective
Figure 4 Opening VulCon perspective.
Figure 5 First VulCon project created.
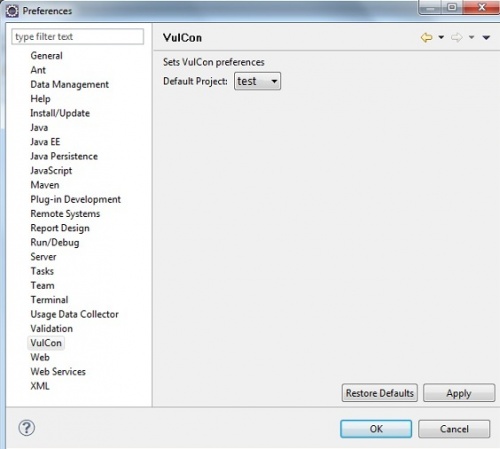
Dal Menu di Eclipse Windows > Preferences ,the user can set the newly created project.
Figure 1 Preferences.
Export function is available in the “Menu Explorer” view, File > Export > “VulCon Export Tool > VulCon Project Simply select the project to export and enter a name in the jar file and click Finish.
File:ExportConfiguration.png
ExportConfiguration
Figure 6 Export Configuration.

