Difference between revisions of "VulCon"
(→Installation) |
(→Installation) |
||
| Line 30: | Line 30: | ||
</syntaxhighlight> | </syntaxhighlight> | ||
add the following path: | add the following path: | ||
| − | * <code> http://www.greenvulcano.com/download/vulcon/update-site <code> | + | * <code> http://www.greenvulcano.com/download/vulcon/update-site </code> |
and download the plugin {{VULCON}} | and download the plugin {{VULCON}} | ||
Once ended the installation procedures from menu , let's check if installation has been done Correctly. | Once ended the installation procedures from menu , let's check if installation has been done Correctly. | ||
Revision as of 12:05, 25 March 2013
Introduction
VulCon is a graphical console that helps the users to design and configure GreenVulcano® ESB business flows. It's an Eclipse plug-in.
The actors involved in GreenVulcano® ESB business flows implementation are:
- Business Analyst: designs the business flow regardless how to interface systems.
- Technical specialist: configures the flow designed by Business Analyst, adding all technical information needed to interface systems.
At the end of design and configuration job, the user is able to generate a zip file containing all necessary GreenVulcano® ESB files, in order to deploy and test the business flows by means of GV Console®.
Requirements
In order to install and run VulCon plug-in, you must accomplish the following requirements:
- Java JDK SE (v.1.6 or higher) download
- Eclipse IDE for Java EE Developers (v.3.5 or higher) download
Installation
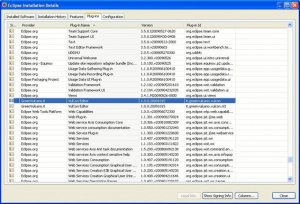
The installation procedure consists in decompressing the vulcon-(Version Number).zip file and then copying the jar file into Eclipse dropins folder. After starting Eclipse, you can check if the plug-in has been installed correctly, following the menu item
Help --> About Eclipse Platform --> Installation Details.
In the plug-in list check if "VulCon Editor" is present, in this case it has been successfully installed.
Unlike old version, VulCon istallation is different to the previous one. Menu of Eclipse
Eclipse --> Help ---> Install New Software
add the following path:
and download the plugin VulCon Once ended the installation procedures from menu , let's check if installation has been done Correctly.
windows --> Preferences --> VulCon
Let’s check if installation has been correctly done.
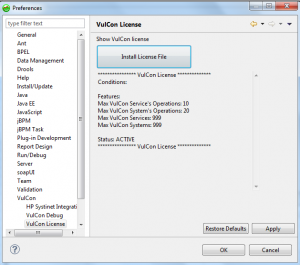
In order to see VulCon license information
Open Windows --> Preferences --> VulCon License.
From this section you can see:
- the product expiration date
- max VulCon service's operation
- max VulCon system's operation
- max VulCon services
- max VulCon systems
Unlike the previous version, the installation of the VulCon license can be done using the following form:
Windows --> Preferences --> VulCon --> VulCon License --> Install License File.
here you can upload the license received by email.
Next steps
In order to learn more about VulCon user interface see Example Creating a new VulCon project and VulCon perspective section. Otherwise, if you already know the user interface, you may want to design and configure your VulCon first flow. Once implemented your business flow you may visit the VulCon deploy, and to test it you must use GV Console® deploy. If you have an existing VulCon project you can import it. To manage the life cycle of your application you can use HP Systinet.
See the amazing Debugger available from GreenVulcano® ESB v3.3, the essential tool for your productivity. Find here the new VulCon configuration wizard.
{{#w4grb_rate:}} <w4grb_ratinglist latestvotes items="5" nosort/>


